Feeds:
Posts
Comments

So, i DO like coleslaw, but rarely eat it. I think I’m pretty picky about it – it’s either too sweet or too mayonnaise-y or too soggy or too wet. I read a couple coleslaw recipes this weekend since we were pretty set on having it for dinner with our beans and cornbread and bbq. None of them struck my fancy as much as I’d have liked, so obviously, I created the following recipe. Its tart and vinegary without overpowering the greens and its a bit creamy without being nasty. It tastes very fresh and healthy (and hey, it IS pretty healthy). I should also mention the kale and parsley were grown by my mom and brother, and the cabbage and carrots came from farmers this morning =) I think the base can be pretty flexible in terms of what greenery/veggies you add, and I’d even go for throwing in some walnuts or peanuts too.

Lettuce Mix: I’d say you have some huge flexibility here. Use purple or green cabbage and then throw in some contrasting veggies like shredded carrots or zucchini. I was surprised that half a head of cabbage filled my huge bowl, so don’t go too nuts.

1/2 head green cabbage, shredded or julienned

1 cup shredded carrots (or more if you fancy)

1 handful chopped purple kale (or regular, whatever)

1 handful finely chopped parsley

Dressing:

3/4 cup plain yogurt

1/4 cup white wine vinegar

1/4 cup olive oil

1 tbsp. horse radish (i used a heaping one)

1 tsp. celery seeds

1 tsp. caraway seeds

1 tsp. poppy seeds

1 tsp. sugar

zest and juice of one lemon or lime (i made this twice, one with each citrus, both were tasty)

salt and pepper to taste

Whisk all of the above ingredients together; you can do this ahead of time and store in fridge. Toss with greens 20 minutes before serving. This ain’t bad as leftovers either. Easy peasy.

My dad and brother picked 2 5-gallon buckets of Chanterelle mushrooms over the holiday. We bbq’d them, sauteed them, and dehydrated them for later. To use up the last few, I decided to make a soup. Because the mushrooms are so fresh, they contain a LOT of water which makes a really nice juicy gravy when cooked, and makes the soup even better. I suppose you can do this with different types of fresh mushrooms and get different flavors. I generally make a butt-load of soup at once, so this recipe could easily serve 10, or you can freeze half!

4 cups chopped fresh Chanterelle mushrooms (you can substitute other types, but they should be very fresh and a flavorful variety)

1 8 oz. package of crimini or baby portabella mushrooms, chopped

1 1/2 cup chopped celery

2 cups chopped onions

1 entire bunch of garlic, chopped

4 cups chicken broth (or veggie if you prefer)

3 cups water

1/2 cup heavy cream or half and half (i did not have this in the fridge, but i am positive it would make it better)

3/4 cup wild rice

1/4 cup chopped parsley

6 oz. goat cheese

2 oz. bleu/stilton/roquefort or other moldy cheese

salt

pepper

sage

First, combine 2 cups of the Chanterelle mushrooms with all of the crimini mushrooms, onions, celery, and garlic in a large skillet with a drizzle of olive oil. Sautee on high heat until the onions become soft and the mushrooms are halved in size. There should be plenty of moisture from the mushrooms so you do not need to worry about anything burning. If your mushrooms are not moist enough to give off a lot of juice, add a half cup of water at a time to be sure the veggies stay  moist.

Transfer the sauteed veggies, any liquids in the pan, plus 2 cups of chicken broth to a blender. Pulse until the mixture is well combined, but not completely pulverized. I like a little texture.

Now place the blended mushroom mixture into a large saucepan. Add the remaining broth and water. Bring to a boil and reduce immediately to a simmer. Add wild rice.  This is a good point to taste it and add in some salt, pepper, and sage (probably 1 teaspoon to start). You can always add more later. Let simmer for about 20 minutes so the rice is halfway cooked. Add remaining Chanterelle mushrooms (these ones should be cubed into bite size pieces), cream, and parsley. Break goat and bleu cheese into chunks and add to soup. Stir every 5 minutes or so until the cheeses are blended in. Add more spices if necessary. Cook until rice is done.

Serve soup with a dollop of greek yogurt and sprinkle of green onions or a slice of toast with goat cheese spread. Will freeze nicely!

Spinach Artichoke Dip

Very easy for a quick appetizer!

1 8 oz. package chopped frozen spinach

1 15 oz. can artichoke hearts (i think usually these come in 13.5 oz cans, which is also okay)

1/3 cup cream cheese, softened

1/3 cup plain yogurt

1/3 cup heavy cream

4 oz. mozzarella cheese, grated

1/3 cup Parmesan cheese, grated

1 teaspoon pepper

1 1/2 teaspoon salt

Preheat oven to 400 degrees. Chop artichoke hearts and place in medium bowl. To defrost the spinach, place it in a colander and run warm water over it until leaves become soft and separated. With your hands, squeeze out most of the water from the spinach and place in bowl with artichokes. Add remaining ingredients and stir well until combined. Place into a pie pan or 8×8 pan, spreading with a spatula to smooth. Sprinkle an extra handful of Parmesan cheese on top. Put in oven and bake until hot throughout, and cheese on top begins to brown, around 15 – 20 minutes. Remove from oven and serve with white corn tortilla chips or toasted baguettes!

Lemon Curd

Well, with a bunch of lemons laying around from my grandparent’s tree, they were just begging to be used up in a recipe. In my opinion, fresh lemons are one of the best ingredients in existence – nothing compares to some fresh grated zest, or the real juice. I’ve already done some lemon bars, and since I’ve never attempted curd, I did a little internet research. The recipe I used came from the Fine Cooking website, contributed by Elinor Klivans. It got pretty stellar reviews, including appreciation over the fact that this recipe does not require straining. This is because the eggs are beat thoroughly with the butter and sugar before being thrown in a hot pan, reducing the chance that any egg parts cook separately, creating unsightly chunks in your curd. This technique seemed to work great, as my curd turned out flawless on the first attempt! I had trouble canning it since I was more tempted to spoon it directly into my mouth. This tart curd can be used spread on scones or shortbread, or used as a cake filling. In my humble opinion, the recipe could also be jazzed up for special events: stir in some chopped mint or basil at the end with the lemon zest, maybe add some fresh or candied ginger, or layer with whipped cream in cups for a treat at tea time! I will keep you updated if I try any of these variations.

3 oz. (6 Tbs.) unsalted butter, softened at room temperature
1 cup sugar
2 large eggs
2 large egg yolks
2/3 cup fresh lemon juice
1 tsp. grated lemon zest

In a large bowl, beat the butter and sugar with an electric mixer, about 2 min. Slowly add the eggs and yolks. Beat for 1 min. Mix in the lemon juice. The mixture will look curdled, but it will smooth out as it cooks.

In a medium, heavy-based saucepan, cook the mixture over low heat until it looks smooth. (The curdled appearance disappears as the butter in the mixture melts.) Increase the heat to medium and cook, stirring constantly, until the mixture thickens, about 15 min. It should leave a path on the back of a spoon and will read 170°F on a thermometer. Don’t let the mixture boil.

Remove the curd from the heat; stir in the lemon zest. Transfer the curd to a bowl. Press plastic wrap on the surface of the lemon curd to keep a skin from forming and chill the curd in the refrigerator. The curd will thicken further as it cools. Covered tightly, it will keep in the refrigerator for a week and in the freezer for 2 months.

I made this frittata because I had leftover salmon from last night’s dinner. Though we ate it for dinner accompanied by steamed broccoli with lemon, it would make a delicious brunch entree with some hash browns and fresh fruit. Yummmm. In addition, this was so easy to make because it only takes one pan!

salmon frittata cropped

1 small zucchini or other seasonal squash

1 chunk of celery root about the size of a deck of cards, peeled

rind from 1 lemon, roughly grated

8-10 oz. pre-cooked salmon (or however much you have left over!)

Salt and pepper

7 eggs

1/3 cup plain yogurt

1/2 cup crumbled bleu cheese

2 tablepsoons chopped fresh basil

Preheat oven to 450. In a medium cast iron skillet, heat 1 tablespoon olive oil. Grate zucchini and celery root directly into pan and brown. Grate lemon rind over skillet and season with salt and pepper. Using a fork, shred salmon into small bite-sized pieces and toss with the sauteed veggies.  I add 2 more tablespoons of olive oil at this point to ensure that the eggs wont stick to the pan.  Beat the eggs and yogurt together in a bowl, then pour over salmon and vegetables. Reduce heat to low/medium and allow to cook without stirring. While the bottom of the frittata cookes, sprinkle the bleu cheese over the top. When the frittata is cooked about half way through, from the bottom, transfer into a 450 degree oven. When five minutes have passed, sprinkle the chopped basil over the top of the frittata so it becomes semi-embedded into the partially cooked egg. Continue to cook until frittata is set, but do not overcook or it will become dry. Remove from oven, cool, slice, and serve.

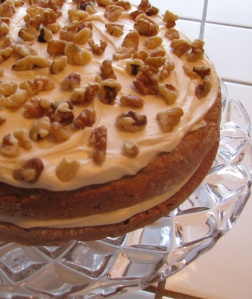
carrot cake croppedUnfortunately this recipe is too old to be archived on the Cooking Light website, so I will retype it in the near future. This cake is really tasty for being “healthy.” It uses applesauce and yogurt so that it can cut down on oil and eliminate butter. In addition, it uses a combination of egg whites and whole eggs to cut out a little cholesterol. That said, I’m usually quite skeptical of “light” or “low cal” food, especially desserts, so imagine my pleasant surprise the first time I made this tasty cake. My mom and I have been using this recipe for the past 8 years, so its probably time I post it!

I have made a couple changes over the years: I like to add 2 teaspoons of fresh grated ginger because it gives it a more holiday-esque spice cake-ish feel. Also, maybe because the oil amount has been cut down from a regular cake, it is VERY easy to over-stir this cake and give it a spongy or tough texture. To solve this, I beat the 2 egg whites by themselves  with an electric mixer until stiff peaks form. Combine the wet and dry ingredients according to the recipe, just barely moistening all the dry. Fold in the egg whites with the shredded carrot. This helps to keep the batter light and fluffy. Lastly, rather than frost the whole cake, I like the look of putting the cream cheese frosting between the two layers and on the top of the cake only – however, decide for yourself!

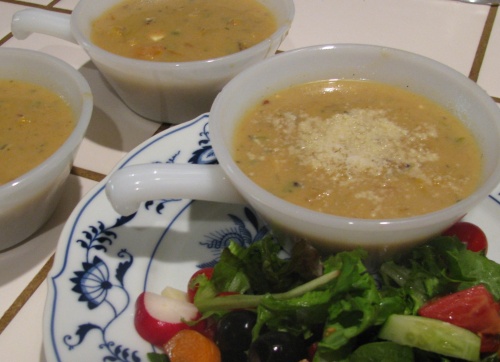
My mom said this was the best soup she’d ever had…truth? Not sure, but maybe ;)

pumpkin soup cropped

This makes around 8-10 appetizer servings, or 4-5 meal sized servings

1 medium sugar pumpkin (slightly smaller than a cantaloupe)

1 1/2 cup sliced carrots

1 large yellow onion

3/4 cup diced celery root

5 cloves roasted garlic

32 oz. (4 cups) chicken broth

1 tablespoon fresh grated ginger

1/2 teaspoon nutmeg

1/4 teaspoon chili flakes/cayenne pepper

1/2 teaspoon thyme

salt and pepper to taste

4 chopped green onions

1/2 cup brown or wild rice

1/3 cup cream cheese

1/3 cup bleu cheese

Parmesan cheese for topping

Peel and dice the entire pumpkin into 1/2 inch cubes. For more complete instructions on handling and preparing pumpkins see my previous post. Set aside half of the pumpkin to be sautéed, and boil the other half until it is mashing consistency.  Meanwhile, coat the garlic cloves in olive oil and roast in the oven or toaster oven until soft. Finely chop the onion and celery root. In a frying pan, heat 1 tablespoon olive oil. Add the onions, celery root, and roasted garlic to the pan, cooking until the onions become soft and translucent and the celery root is lightly browned. Avoid over-stirring as ingredients will not brown.  Remove from heat. Place half of the onions and celery root into a blender, along with all of the roasted garlic and boiled pumpkin. Add enough chicken broth to cover (about 1 cup). Blend on high speed until mixture is smooth. Set aside.

Add 2 tablespoons olive oil and 1 tablespoon butter to a saucepan that is at least 3 quarts. The larger the better as it will provide more surface area in contact with heat. Using high heat, place the rest of the diced pumpkin and carrots into the saucepan. Allow the vegetables to sit about 5 minutes between stirring so they have a chance to brown on all sides. Add the remaining onions and celery root to the saucepan, along with grated ginger. Sautee for 3 more minutes. Add pureed pumpkin mixture and remaining chicken broth to saucepan, using medium heat until boiling.

Once boiling, reduce heat to a simmer. Add nutmeg, chili flakes, thyme, green onions,  salt and pepper; stir well. Add rice and stir again. Simmer 30 minutes. Add cream cheese and bleu cheese in tablespoon sized chunks. Stir every 1 or 2 minutes until rice is cooked and cheese is melted and incorporated.

Remove from heat; ladle into bowls and top with shredded Parmesan cheese.

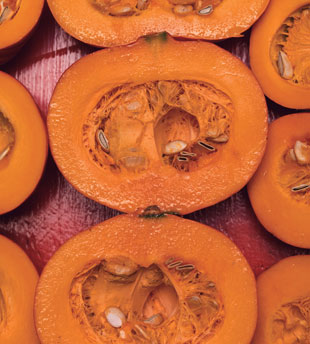
Image from Bon Appetit

Image from Bon Appetit

Much to my delight, this month’s Bon Appetit has an amazing article on my all-time favorite food: Pumpkin! Check it out for more info and some inspiring recipes. The beauty of pumpkin is that it goes well with sweet (pumpkin pie, naturally) like molasses, sugar, brown sugar, and cream. It also pairs nicely with seemingly unusual combinations of vegetables and spices: try mushrooms, scallions, leeks and spices like chili powder, mustard, cilantro, or thyme.  My favorite way to prepare pumpkin is with something bold, like lots of ginger or bleu cheese. it has such a creamy soft texture and subtle flavor, so the dish changes dramatically depending on what you add!

Oct/Nov are my favorite months solely because of 1. Fresh Pumpkin in the stores and 2. Thanksgiving. The following Venn diagram illustrates my most ultimate happy moment:

For Everything Else, There's Mastercard.

For Everything Else, There's Mastercard.

But seriously. I think a lot of people are daunted by the idea of cooking pumpkin. Truth be told, it takes a little work on the front end, but is totally worth it and a lot of the preparation for cooking pumpkin can be done ahead of time.

What to Look For

If you are cooking pumpkin, buy a sugar pumpkin (also known as pie pumpkin or sweet pumpkin). Bon Appetit says “Look for a pumpkin that’s smaller and rounder with less defined ridges than jack-o’-lantern pumpkins. Choose firm ones that feel heavy for their size and have dull, not glossy, skin.” I like pumpkins that are roughly the size of a small watermelon or a honeydew melon; one of these is the perfect size for a soup or a pair of pies. In addition, this smaller size makes them easier to handle with a knife, peeler, and spoon.

Dismantling a Pumpkin

First, make a horizontal cut to take off the stem and top of the pumpkin. Make a second cut parallel to this to take off the bottom, just enough to get rid of the uneven surface. Now stand the pumpkin up on its newly flattened bottom. Make one vertical cut to divide it exactly in half. Using a spoon, scoop out the stringy insides and seeds. I find it easiest to take off a very thin layer of the actual pumpkin flesh to ensure that the part you use will be smooth and string-free. Be sure to set aside the seeds for use later! If dicing the pumpkin, use a vegetable peeler to remove the skin – this is where getting a SMOOTH pumpkin comes in handy. If leaving the pumpkin in large pieces for roasting, do not remove skin. Lastly, cut the pumpkin into 1 inch strips and from there 1 inch cubes. You are now ready to make somethin’!

For Roasting

You should have two skin-on pumpkin halves. Cut each of these vertically in half so you now have 4 pumpkin wedges. The easiest way to roast a pumpkin is to brush the exposed flesh with olive oil, place skin down on a baking sheet, and pop into a 350 degree oven until browned and softened. Top with cream, brown sugar, ginger, or salt and chili powder, and enjoy with a spoon!

For Pies, Soups, and Recipes Calling for Pumpkin Puree

Take the cubed pumpkin and place into boiling water, probably around 10 minutes depending on how thick you cut your cubes. You know they are ready if a fork slides effortlessly into a cube. The texture should be something like a baked potato – soft so it can be mashed but not overcooked into a gooey sloppy mess. It will not have the bright orange color you see in canned pumpkin, it will look like a bright goldenrod or dandelion color.  Pour over a colander to drain the water from the pumpkin pieces. Transfer to a bowl. Using a fork or potato masher, mash the pumpkin until it is smooth. The pumpkin puree can be kept in the fridge in an airtight container for several days. I recommend making a 2-3 pumpkin batch of puree and freezing into 2 cup portions. A can of pumpkin is 15 oz. which is slightly less than 2 cups, so it is safe to assume that most recipes will call for pumpkin in 2 cup increments.  Now, when you want to make a pie, you have pumpkin already made in the freezer!

Sauteed Pumpkin

A third way to prepare pumpkin is to sautee it. In order to cook it in a reasonable amount of time, you will want to slice it smaller, say 1/2 inch cubes or 1/4 inch thick scallops. You can store raw diced pumpkin in an airtight container for several days in the fridge. When you are ready to prepare it, throw some in a hot skillet with butter or olive oil and add desired seasonings. Pumpkin is very tasty when browned on all sides in a frying pan – just add a couple tablespoons of water and cover towards the end of cooking to be sure the inside cooks through. Again, you can add either sweet or savory spice, and something nice like mushrooms, thyme, or cilantro.

Asian Whiskey Roast

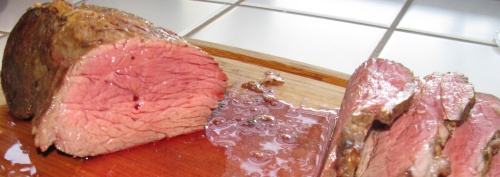
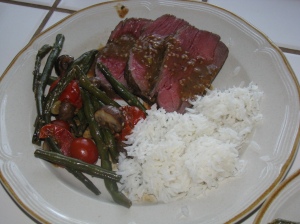
Freshly sliced Asian Whiskey Roast

Freshly sliced Asian Whiskey Roast

The other day I sampled some Trader Joe’s Gyoza Dipping Sauce – “for everything Asian” – at the taster table. I was inspired to make a roast with an Asian flair (and of course my favorite ingredient…whiskey). For a side dish, braise vegetables in a pan and top with the extra marinade just before roast comes out of the oven.

2 pound roast (I used beef, but pork would be tasty as well!)new 017

1/2 cup Trader Joe’s Gyoza Dipping Sauce

1/2 cup whiskey – something sweet goes best with this recipe, pick up some cheap blended =)

4 cloves garlic, minced

2 tablespoons mustard

1 tablespoon hot sauce

1 tablespoon sesame oil

sesame seeds for sprinkling

new 018

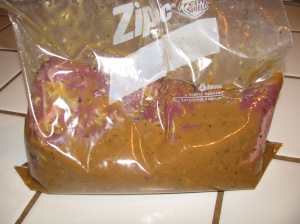
Pour all of the ingredients (meat aside) into a gallon sized Ziplock bag. Squish it all around until mixed. I make all my marinades in a Ziplock because it saves a dish, and you can marinade your meat without a mess. Place your meat into the bag, squeeze out excess air, and seal. Refridgerate overnight.

Before cooking, be sure to take the Ziplock out of the fridge 1-2 hours before cooking. Cooking cold meat should be avoided in most cases; bringing it to room temperature will allow it to be a more tender roast and you will have more control over the cooking temperature. For example, to get a juicy, rare beef roast, you only want to cook it until warm in the middle, about 125 degrees; starting with a cold piece of meat will force you to cook it longer before reaching temperature, and a greater area of the cross section will be cooked more than you intended.

Preheat oven to 325.

Heat an iron skillet or dutch oven (something that can be used both on stove and in oven) over the stove to medium-high heat. Remove roast from Ziplock, shaking to remove excess marinade. Place roast in skillet, about 2-3 minutes on each side, until browned. Usually you sear, or brown, a roast before cooking to seal in the juices. If the roast is moist from marinade, the roast will not crisp. If you do a dry rub, you can get a nice crispy crusty edge going on.

Once browned, insert a meat thermometer into the center of the roast.  Place skillet into the oven. Remove when meat reaches desired temperature. For pork, this must be 160 degrees in order to prevent illness. I removed my roast at 120 degrees for rare beef. Remember that once you remove your meat from the oven, the internal temperature will probably rise around 5 degrees, so keep that in mind.  Do NOT cut your meat immediately. It should be left to rest 15-20 minutes in order to reach maximum juice levels (this is when your meat will gain its extra 5 degrees).

Slice, and serve. Spoon juices over arranged slices and sprinkle with sesame seeds. I think this is best served with rice and veggies.

new 033

Another gem I found from sorting recipes – I made this cake for a chocolate lover’s birthday.  Bon Appetit ran a Julia Child special a few months back, undoubtedly inspired by the debut of the  Julie&Julia movie; the Reine de Saba (Queen of Sheba) cake jumped out at me immediately. It was mildly time intensive, but worth it!  I found the cake to be velvety soft, and chocolate-y without being too rich or over the top. Ground almonds and a touch of rum give it some unique flair.

Slightly under baking this chocolate and almond cake ensures its creamy texture.

Cake

4 ounces semi sweet chocolate, chopped

2 tablespoons rum (I used Meyers Dark)

1/2 cup unsalted butter, room temperature

2/3 cup plus 1 tablespoon sugar

3 large eggs, separated

large pinch of salt

1/3 cup finely ground almonds

1/4 teaspoon almond extract

3/4 cup sifted cake flour

Position rack in center of oven and preheat to 350. Butter and flour an 8-inch diameter cake pan with 2 inch high sides. Combine chopped chocolate and rum in medium metal bowl. Set bowl over medium saucepan of simmering water. Stir until chocolate is melted and smooth. Remove bowl from over water. Cool melted chocolate, stirring occasionally.

Using electric mixer, beat butter and 2/3 cup sugar in large bowl until fluffy and pale. Add egg yolks and beat until blended.

Using clean dry beaters, beat egg whites and pinch of salt in medium bowl until soft peaks form. Add 1 tablespoon sugar and beat until stiff but not dry.

Fold chocolate mixture, then almonds and almond extract into yolk mixture. Fold in 1/4 of the whites to lighten batter. Fold in 1/3 of remaining whites. Sift 1/3 of flour over and fold in. Fold in remaining whites alternately with flour in 2 more additions each. Transfer batter to prepared pan. Push some batter 3/4 inch up sides of pan with rubber spatula (batter will slip down).

Bake cake until puffed and gently set in center and tester inserted into center comes out with a few moist crumbs attached, about 25 minutes. Cool cake in pan 10 minutes. Cut around pan sides and carefully turn cake out onto rack. Cool completely, about 2 hours.

Chocolate Butter Icing

1 ounce semi sweet chocolate, chopped

1 tablespoon rum

3 tablespoons unsalted butter, room temperature

Combine chocolate and rum in small metal bowl. Set bowl over small saucepan of simmering water and stir until melted and smooth. Remove bowl from over water. Using wooden spoon, beat in butter, 1 tablespoon at a time, until icing is smooth. Place bowl over medium bowl filled with ice water. Continue to beat until icing is cool and thickened to spreading consistency.

Place cake on platter. Scrape icing onto top center. Using small spatula, spread icing evenly and thinly over top and sides of cake. Can be made 1 day ahead; cover with cake dome and store at room temperature.

I food-processed extra almonds and sprinkled them over the cake for a little visual excitement and crunch.

Test-Kitchen Tip: slightly pushing the cake batter up the sides of the pan before baking (even though the batter will slip down again) can help ensure that the cake will stay level and bake more evenly.